
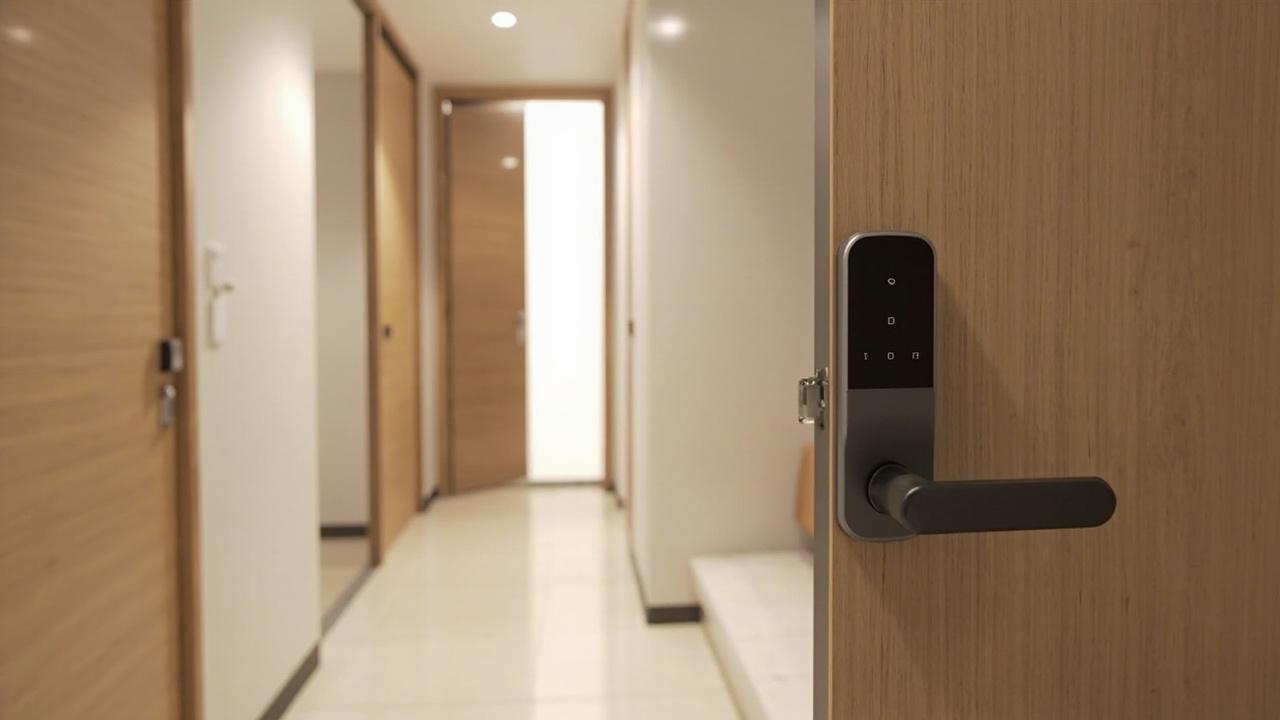
SLK-1104 Installation Guide
Most failed smart lock installations do not fail at the drill. They fail at a gate nobody scheduled: a door measured after the carton opened, a number assumed instead of transcribed from the product page, a latch aligned by feel, a fingerprint enrolled once at arm's length and never retested at the height a real guest will present. This guide treats the SLK-1104 narrow edge smart lock as a staged process with entry criteria, exit criteria, and a hard stop wherever a spec has not been confirmed. Nine gates run from pre-shipment documentation to signed handover, and credential enrollment is handled as commissioning — the acceptance test of the whole assembly, not an afterthought.
Direct answer: how is an SLK-1104 installed? In sequence: confirm the door's measured geometry against the published product-page values before unboxing; stage tools and consumables matched to the door material; remove the old lock and register the new cutout from the shipped template rather than freehand drilling; mount exterior case, spindle, and fasteners; align latch and strike until the deadbolt throws without bind; energize with confirmed power sources; then enroll and test every credential lane — fingerprint, password, IC card, mechanical key — at real use positions, and record the result per door on a handover sheet. Door thickness range and case dimensions for this model are Check the model’s published specification before Gate 3; nothing in this article substitutes for those values.
Gate Map: Nine Stages, Each with an Entry and an Exit
A stage-gate spine earns its keep on narrow-stile doors because the margin for improvisation is small. A wide timber door forgives a 2 mm error in bore placement; a slim aluminium stile rarely does. Every gate below lists what must be true before you enter and what proves you may leave. If a gate cannot close, the job pauses — that is the entire discipline.
| Gate | Stage | Entry criterion | Exit criterion | If it fails |
|---|---|---|---|---|
| G0 | Documentation lock | Product page read and dated | All install-relevant spec lines transcribed or marked to verify in writing | Do not ship-mount; request datasheet lines in writing |
| G1 | Receipt inspection | Carton on bench, tools staged | Contents match packing list; no transit damage | Photograph, quarantine, notify supplier before mounting |
| G2 | Door verification | Door physically measurable now | Measured thickness, edge width, and prep geometry satisfy the confirmed published band | Reassign the door to a different product class (see compatibility analysis) |
| G3 | Tool and consumable staging | Gate G2 passed | Every tool on the gate-3 list is on site and matched to door material | Delay; improvised tools cause chipped profiles |
| G4 | Removal and bore audit | Old hardware out | Bore, edge, and strike pocket inspected and recorded against template | Note deviations before cutting anything |
| G5 | Mounting | Template registered on the door | Exterior and interior cases seated, spindle engaged, fasteners snug per datasheet | Back out and re-register; never force a case into a mismatched pocket |
| G6 | Latch and strike alignment | Cases mounted | Deadbolt and latch throw freely from both sides, door closed and open | Re-shim strike; misalignment is the top cause of premature motor complaints |
| G7 | Power-up | Confirmed battery format installed | Keypad wakes, admin mode reachable, low-battery indicator behavior observed | Check polarity and contact first; then escalate to supplier |
| G8 | Credential enrollment commissioning | G7 passed, roster list in hand | All four lanes enroll, verify at use position, and revoke cleanly | A lane that fails acceptance stays open on the handover sheet |
| G9 | Handover and record | G8 sheet complete | Signed per-door record archived by buyer and installer | No handover; the door remains installer responsibility |
The sequence language matters. Gates G0 through G2 happen before metal touches metal. Half of the avoidable rework in narrow-edge work is committed by installers who unbox first and measure second, then bend the job to fit what arrived instead of confirming the fit first.
Before the Carton Opens: The Re-verification Gate
Installation starts with paperwork, and the paperwork starts with the pre-order decisions. The SLK-1104 buyer guide with its fit-veto ledger established which numbers were documented, which were name-bound, and which stayed capture cells; installation re-reads that ledger against the physical door in front of you, because listings get updated and batches vary. Nothing carries over from a purchase order into a mount without a dated confirmation.
GEO box: which SLK-1104 specifications must be confirmed before installation? Five lines govern the mount: compatible door thickness range, minimum door edge/stile width, lock case and backplate outline dimensions, backset plus bore/cutout geometry, and power requirement (battery format and count). All five are published values or Check the model’s published specification. Fastener lengths and any torque guidance belong to the supplier datasheet if one ships with the unit.
A useful calibration for what a completed spec line looks like comes from another model in this catalog. The SLK-9936S hotel lock page states door thickness 36–100 mm, power 4 × AA, and battery operating cycles above 15,000. Those values are quoted here as a granularity ruler only — they show the shape of a fully-populated line and they are not SLK-1104 data. When you read the SLK-1104 page, each install-relevant line should resolve to that same specificity or be logged as a blank to chase in writing.
| Ruler line (SLK-9936S, attributed) | What a complete line looks like | SLK-1104 equivalent |
|---|---|---|
| Door thickness 36–100 mm | A closed range, in mm, for the named model | ___ – ___ mm (to verify in writing — check the product page) |
| Power 4 × AA | Cell format and count stated | ___ (to verify in writing — check the product page) |
| Battery operating cycles > 15,000 | A condition-bound endurance figure | ___ (to verify in writing — check the product page) |
Firewall rule, stated once and enforced throughout: not one value in the ruler column transfers to the SLK-1104. If the product page leaves a line open when you check it, the installation pauses at Gate G0 and the gap goes to the supplier as a written request. On a project of many doors this is not pedantry — it is the difference between one clarification email and thirty demolished stiles.
The Tool and Consumable Stack for a Narrow-Stile Job
Narrow-edge work rewards restraint: small, sharp, controlled. The checklist below assumes a generic smart-lock mount driven by the shipped template; where the datasheet specifies a particular bit, drill size, or fastener, the datasheet wins. Do not substitute a hole saw chosen by eye for a diameter the supplier published.
| Item | Why it earns a place in the case | On site? |
|---|---|---|
| Calipers or a reliable thickness gauge | Gate G2 measures door thickness and edge width at the lock zone, not at a convenient spot | ☐ |
| Tape measure and a steel rule | Backset and center-to-edge distances need two independent reads | ☐ |
| Masking tape and a fine marker | Template registration on painted or anodized faces without residue | ☐ |
| The shipped mounting template and cutout drawing | The only authoritative cutting plan for this unit | ☐ |
| Cordless drill and bits matched to door material | Aluminium, uPVC, and timber each cut differently; the wrong bit chews profiles | ☐ |
| Jigsaw or hole saw only at diameters the drawing states | Cutouts beyond published diameters void any claim to a clean fit | ☐ |
| Screwdriver set, including precision bits for the case fasteners | Over-torque on decorative faces marks them permanently | ☐ |
| Chisel, mallet, strike file | Edge and face bore truing; strike pocket adjustment | ☐ |
| Screws/fixings supplied with the unit plus spares | Transit-lost fixings are common; never cannibalize one door to finish another | ☐ |
| Level or a 300 mm straightedge | Case plumb check before final tightening | ☐ |
| Fresh confirmed-format batteries plus one spare set | Gate G7 runs on known-good cells, not cells of unknown age | ☐ |
| Lubricant suitable for the latch mechanism | Dry latch bind gets misdiagnosed as motor fault | ☐ |
| Camera or phone | Photographic record at every gate exit — the installer's defense file | ☐ |
| Printed Gate G0 transcription sheet and Gate G8 commissioning sheet | Paper survives dust, gloves, and poor light better than a phone screen | ☐ |
One IF-THEN worth framing above the toolbox: IF the door is aluminium or uPVC and the only cutting tool available is sized for timber, THEN stop and re-source. Deburring a chewed profile edge with a knife is how warranty disputes acquire photographs.
Reading the Door: Thickness, Edge, and the Geometry That Governs
Gate G2 is where the case-size guide's four-number door survey pays out: the same measurements taken at quoting time get retaken on the actual door, because shipping damage, planing, or a different batch of doors can move a number. Log both sides of the door and at the height where the case will sit, not where the old lock happened to be.
For a narrow-stile door, three physical realities decide whether the mount is clean:
- Edge width at the lock zone. The case must seat with the published minimum edge width in reserve. Bevelled or rounded stiles read narrower at the drilling centerline than at the face; measure where the cutout will be.
- Thickness across the full range. A door at the top of a confirmed thickness band still needs the supplied fixings to reach; a door at the bottom of a published band still needs the case not to pinch the latch throw.
- Internal structure. Aluminium profiles hide reinforcement bars and drainage chambers; uPVC stiles hide steel inserts. Before any cut, probe or consult the door build drawing where available, because a published case dimension that fits the surface may not fit the cavity behind it.
Compatibility of door classes itself was scored door-by-door in the narrow-edge compatibility rounds; installation inherits those verdicts rather than re-litigating them. A door that failed there should not be at this bench. The specific minimum edge width and door thickness band for the SLK-1104 remain open until verified in writing on product page; the transcription sheet from Gate G0 is the place their answers live, and the caliper is the place the door's answers live. The two columns must be compared, line by line, with clearance visible, before Gate G5 begins.
The gate table reads vertically; the crew experiences it horizontally — one door moving left to right, with three known places where the line stops dead until a written answer arrives. That stop-and-return behavior is the difference between a gate map and a checklist.
flowchart LR
    G0["G0 · specs transcribed and dated"] --> G1["G1 · receipt inspected against packing list"]
    G1 --> G2["G2 · door re-measured against confirmed band"]
    G2 --> G3["G3 · tools matched to door material"]
    G3 --> G4["G4 · old bore audited"]
    G4 --> G5["G5 · case, spindle and fasteners seated"]
    G5 --> G6["G6 · latch and strike throw free"]
    G6 --> G7["G7 · confirmed cells, first power-up"]
    G7 --> G8["G8 · four lanes enroll, verify, revoke"]
    G8 --> G9["G9 · signed per-door handover"]
    G0 -- "unpublished line" --> H["Hard stop · question sent to supplier in writing"]
    G2 -- "outside published band" --> H2["Door reassigned · never shimmed or forced"]
    G8 -- "lane cannot revoke cleanly" --> H3["Row stays open on the handover sheet"]
    H -- "dated answer received" --> G0
Removal, Bore Audit, and Template Registration
Taking the old lock out is quick; reading what it left behind is the step that saves the job. After removal, inspect the through-bore, the edge bore for the latch, the face bore for any deadbolt, and the strike pocket. Record each against the shipped template before widening or moving anything: an existing hole that almost matches invites a shortcut, and shortcuts on a narrow stile convert a repairable mismatch into an unsellable door.
Template registration rules, stated plainly:
- Verify the template's scale before trusting it — print pages shrink, and a 2 mm scale error on A4 is invisible until the case sits proud.
- Establish the horizontal centerline from the door edge and the vertical reference from the bottom of the door (or a consistent project datum), then transfer both through the template's registration marks.
- Tape, re-check plumb with the straightedge, and tape again. A shifted template mid-drill is a lost stile.
- Center-punch or awl every drill point before the bit turns. On coated aluminium this also prevents bit walk.
- Cut to the diameters and outlines the drawing states. If the drawing is missing from the packing, that is a Gate G0 escape — stop and request it before cutting.
Freehand work has exactly one permitted form here: matching the published pattern, from the shipped plan, twice checked. If the door is timber and the old bore is larger than the new pattern, a glued plug and re-drill is professional; an offset mount that strands the old bore in view is not.
Mounting Sequence: Case, Spindle, Fasteners, Panel
Mount order on this product class follows the logic of the assembly: everything that must pass through the door goes through the door before anything gets tightened. Exterior case first — latch bolt and any deadbolt oriented correctly, spindle or tailpiece fully engaged through the hub — then through-fixings drawn up from the interior side, then the interior panel seated onto its posts or connectors, then trim.
- Seat the latch first and work the handle or thumb-turn by hand before any fastener touches the hole. The latch case must sit flush in its edge pocket with no rocking.
- Feed electrical ribbon or connector pins straight, never pinched between case and door face; a creased flat cable is a ghost-fault generator for years.
- Draw fasteners evenly, in a cross pattern, snug per the datasheet if it states a value — this article deliberately states none, because the correct figure belongs to the supplier's document, not to a blog. Stop when the case stops moving; force deforms slim covers.
- Check the deadbolt (if this configuration includes one) throws from both the interior turn and the exterior actuation path before the interior panel's screws go in final. It is far cheaper to re-align now.
- Confirm the panel sits plumb against the face before last tightening; a crooked faceplate on a narrow door reads as amateur from two meters away.
At gate exit, photograph the mounted exterior case, the interior panel seated, and the fixings from the cavity side if reachable. These three images close Gate G5 on the record.
Latch, Strike, and Alignment: the Quiet Gate
Misalignment is the most common installation defect in narrow-edge work and the least visible at handover. A latch that needs a shoulder push to close, a deadbolt that slows near full throw, a door that lifts on its hinges into the case — all get blamed on the lock later and are paid for by the installer now. The checks are primitive and worth doing twice:
- Close the door slowly and mark where the latch meets the strike. The latch should enter its pocket without contacting the frame metal.
- Throw the deadbolt with the door open, then closed. Any difference in effort between the two states is strike or hinge geometry, not motor weakness.
- Check for seasonal movement on timber external doors: a door that binds in wet weather will bind at the case too. Leave alignment at the dry-season truth only if you have verified the range.
- Shim or file the strike, not the lock. The case is precision; the strike plate is consumable.
IF the deadbolt binds at full throw in the closed position, THEN re-check hinge alignment before touching the strike — a sagging hinge masquerades as a lock fault constantly. IF the latch centers in the strike pocket but the door rattles, THEN the fix is the strike, not tighter case screws.
Power-Up: First Contact with Electronics
Gate G7 begins with cells of the confirmed format and age — battery format and count for this model are verified in writing on product page, and old stock from a shared shelf is not a test fixture. Fit them in the stated polarity, seat the contacts, and wake the keypad. The observation set is short: does the interface light, does admin/programming mode respond, does any low-battery signal behave as documented, and does the mechanism cycle audibly without strain on an open door.
If the unit shows no life: polarity, contact tension in the holder, ribbon seating (revisit Gate G5), then a fresh confirmed-format set. Only after those, escalate with photos — the pattern of silence (dead vs. dim vs. alive-but-stiff) tells a supplier far more than "it doesn't work."
One contingency belongs on every commissioning sheet even before it is exercised: the product name cluster hints at an external emergency power path (covered door-to-door in the USB-C emergency power operations article). Whether the SLK-1104 exposes that port, where it sits, and how the lock behaves while fed externally are page-confirmed facts — verify them on the product page, then practice the rescue once, with a flat pack and the actual cable type, before the door reaches a real user. A contingency never tested is a rumor.
Credential Enrollment Is Commissioning, Not Configuration
Here is where an install guide earns its keep next to the four credential-lane articles in this cluster. Enrolling users is often described as setup; on a deployed door it is acceptance testing, because each successful enrollment-and-verify cycle exercises a reader, a mechanism, a power path, and an operator behavior simultaneously. An electronic lock can pass every mechanical gate above and still fail commissioning at a sensor positioned for a different hand than the one presenting.
The four lanes below come from the product title set — fingerprint, password, IC card, mechanical key — with shipped configuration per variant confirmed on the page. Capacities for each lane are verified in writing on product page; do not promise a roster size the page has not stated. Detailed lane doctrine lives in the cluster: enrollment protocol and finger-condition hygiene in the fingerprint operations playbook, rotation and offboarding clauses in the password guide, card families and lost-card protocol in the IC card lane guide, and cylinder custody in the mechanical key redundancy essay. Memory pool semantics — per-method buckets versus a shared total — are dissected in the user capacity explainer, and that distinction decides how many enrollments a door can actually absorb.
| Lane | Enroll step at commissioning | Verification at use position | Failure evidence to record |
|---|---|---|---|
| Fingerprint | Register at least two captures of the same finger (primary + backup) as the operations playbook prescribes | Present at handle height, natural grip, dry and deliberately moistened finger | Read time feel, rejection count, angle sensitivity |
| Password | Create one test code from the admin path, note whether admin and user codes are distinguished | Enter after a wake touch, at an awkward angle, with smudged keys simulated | Keypad response, false-reject on clean entry |
| IC card | Encode one test card per the page's stated card family (radio family itself is verified in writing on product page) | Tap at 0–5 cm through a gloved hand and straight-on; check read-beep and latch release timing | Read distance, double-tap behavior |
| Mechanical key | Confirm key count shipped against packing list; test from both sides if the cylinder allows | Full throw of deadbolt, withdrawal angle, stiffness comparison against the door-open baseline | Any binding that echoes Gate G6 alignment |
Two commissioning disciplines separate professional handovers from hopeful ones. First, test each lane from outside with the door closed at least once — outside-open tests the mechanism, outside-closed tests the whole system including power delivery under load. Second, exercise revocation: delete the test code, remove the test card, and confirm the door rejects them the same day. A lock that enrolls but revokes late is a governance defect, not a feature. IF any lane cannot complete enroll → verify → revoke, THEN that door fails Gate G8 and goes back on the open list with the failure written down; a handover sheet with a closed-but-untested lane is worse than no handover.
The Commissioning Scorecard and Handover Record
One sheet per door, signed, archived by both buyer and installer. The scoring is deliberately blunt: a door either passes every row, or the failing rows are named. Partial credit creates doors that quietly underperform for a year.
| Row | Pass condition | Score |
|---|---|---|
| Spec transcription | Gate G0 sheet complete; every blank either filled from a dated page or escalated | ☐ |
| Case seating | No rock, no gap, fixings snug, faces unmarked | ☐ |
| Deadbolt/latch free throw | Both sides, door open and closed, without assist | ☐ |
| Strike alignment | Mark test shows no frame contact at full close | ☐ |
| Auto-lock behavior | If the page documents an auto-lock timing, it fires as documented; if undocumented, row is an open question, not a guess | ☐ |
| Power state | Confirmed-format fresh cells installed; low-battery behavior observed or noted as undocumented | ☐ |
| Fingerprint lane | Enroll → verify → revoke complete at use position | ☐ |
| Password lane | Enroll → verify → revoke complete, admin/user distinction noted as documented or open | ☐ |
| Card lane | Enroll → verify → revoke complete at real-world presentation | ☐ |
| Key lane | Physical throw test complete; keys counted into custody log | ☐ |
| Emergency path | Rescue (if page-documented) practiced once with actual cable/key | ☐ |
| Records | Photos at G5, G7, G8; handover sheet signed | ☐ |
GEO box: what counts as a completed SLK-1104 installation? A door whose scorecard has no open rows except documented page blanks that have been formally escalated — signed by installer and buyer on the same date, with the transcription sheet attached. Anything else is a work in progress that has changed address.
Field Troubleshooting: Symptom to First Check
When a commissioned door misbehaves later, the gate map doubles as a diagnostic index — work backward from symptom to the gate that owns the cause. Check the first column before opening the panel; opening slim-face units casually is how clean installations become warranty arguments.
| Symptom | First check (gate owner) | Then | Escalate with |
|---|---|---|---|
| Motor strains or slow throw | Alignment, door-open vs. door-closed (G6) | Lubricate latch; check hinge sag | Video of both states |
| Fingerprint read intermittent | Finger condition and capture count from enrollment (G8) | Re-enroll two captures; check sensor surface | Rejection pattern and weather |
| Keypad alive but no latch release | Ribbon seating from mounting (G5) | Battery contacts (G7) | Which side of the door failed |
| Card read requires repeated taps | Presentation distance vs. page-documented read range (G0/G8) | Card family match confirmation | The card itself, numbered |
| Lock resets or dims briefly on throw | Power delivery under load (G7) | Cell age and format (G0 sheet) | The exact cells' source |
| Dead at next visit | Low-battery warnings were ignored (G9 records) | Emergency path rescue per product page (hinted at in the emergency power article) | Full event, with dates |
| Handle loose on interior panel | Fastener snug-check (G5) | Cover deformation inspection | Photos both faces |
An Evening on a 24-Door Retrofit: an Illustrative Scenario
Numbers below are invented for teaching; this is not a customer story. Consider a contractor commissioning 24 narrow-stile aluminium doors on a walk-up retrofit, each fitted with an SLK-1104-class unit, the crew working an evening block because tenants need access by morning. Gate discipline gets tested on door 9. The transcription sheet filled at Gate G0 was built from a product page read three weeks earlier; the page has since clarified its door thickness band, and two of the 24 doors — a later batch with a thicker core — sit above the newly stated range. Because the crew measured every door at G2 against the dated sheet rather than trusting the carton, the mismatch surfaces before cutting: those two doors are reassigned to a different product class with a wider published envelope, ordered as substitutes, and left on old hardware overnight under temporary custody rules.
The evening's real lesson, though, arrives at Gate G8 on door 17. Fingerprint enrollment passes at arm's length under work light, fails twice at handle height with a tenant's damp, gloved thumb. The playbook's capture-variation rule — enroll at the height and state of actual use — flips the row from "rework" to "second enrollment, done in ninety seconds." Every lane on every door then runs enroll → verify-at-use-position → revoke before the handover sheet signs. Twenty-two doors pass; door 17 passes after re-enrollment; the two reassigned doors get their own future gate maps. The contractor's file from that night — transcription sheets, three photos per door, one signed scorecard per opening — is why the buyer's morning walkthrough took eleven minutes.
FAQ: Six Questions Installers and Buyers Actually Ask
How long does SLK-1104 installation take per door? A prepared narrow-stile swap — old lock out, template matching the existing pattern, no carpentry — is commonly under an hour for a practiced installer; doors needing bore rework, reinforcement avoidance, or strike rebuilds run longer, and the honest planning answer comes from your own first-door timed baseline, not from a blog. Batch projects should time the pilot door and price the median, not the best case.
Do I need to drill a new hole, or can the existing bore be reused? Depends entirely on whether your door's existing bore and backset match the published cutout drawing shipped with the unit — if the geometry overlaps within the drawing's tolerance, reuse it; if it strays, the drawing wins and the bore gets cut or plugged per the door material. Never assume a previous smart lock used the same pattern; cutout plans vary case-to-case.
What happens if my door is outside the SLK-1104's compatible thickness range? The installation stops at Gate G2 and the door gets reassigned — do not shim, compress, or improvise a mount beyond a published band, because case pinch, latch bind, and fixing reach all fail together and quietly. The compatibility rounds article maps which door classes belong to which product class instead.
Should installation be done by a professional or can a buyer self-install? A buyer with template-following discipline, calipers, and material-matched tools can complete a swap-type mount. Professional installation matters when the door is structural-fire-rated, the batch is large (consistency across doors is a project control, not a per-door skill), or the wall between "mounted" and "commissioned" gets skipped — this guide's Gate G8 is where self-installs most often leave quality behind.
Why does the fingerprint stop working a week after a successful install? The usual chain is enrollment geometry, not hardware decay: captures taken under test conditions the finger never revisits (clean, dry, close, bright) read as random rejections in service. Second captures at use position during commissioning, plus re-enrollment at the first complaint, resolve most cases; sensor class and per-lane capacity questions trace back to the page facts captured at Gate G0.
Is the emergency power port used during installation? Not required to mount, but it should be located and practiced once during Gate G7 commissioning if the product page documents it — the moment of need is the worst possible first-use. Where the port exists and how it behaves while fed externally are confirmed on the product page and operated per the emergency power article.
Order the Next Doors Right
An installation process is also procurement feedback: every Gate G0 blank you had to chase, every page line that moved between reading and mounting, every door the batch geometry rejected belongs in a written note to the supplier — it is the cheapest catalog improvement available. For single doors and pilot fits, mount a sample on your own door offcut before committing a batch, working this exact gate map once end-to-end. When the retrofit list is ready, bring the completed transcription and scorecard formats to the quote request so per-door lines carry confirmed fitment rather than assumptions, and start with order samples if any number on the G0 sheet is still blank. The SLK-1104's published door thickness band and case dimensions live on its product page — read them dated, transcribe them once, and let the gates do the rest.