
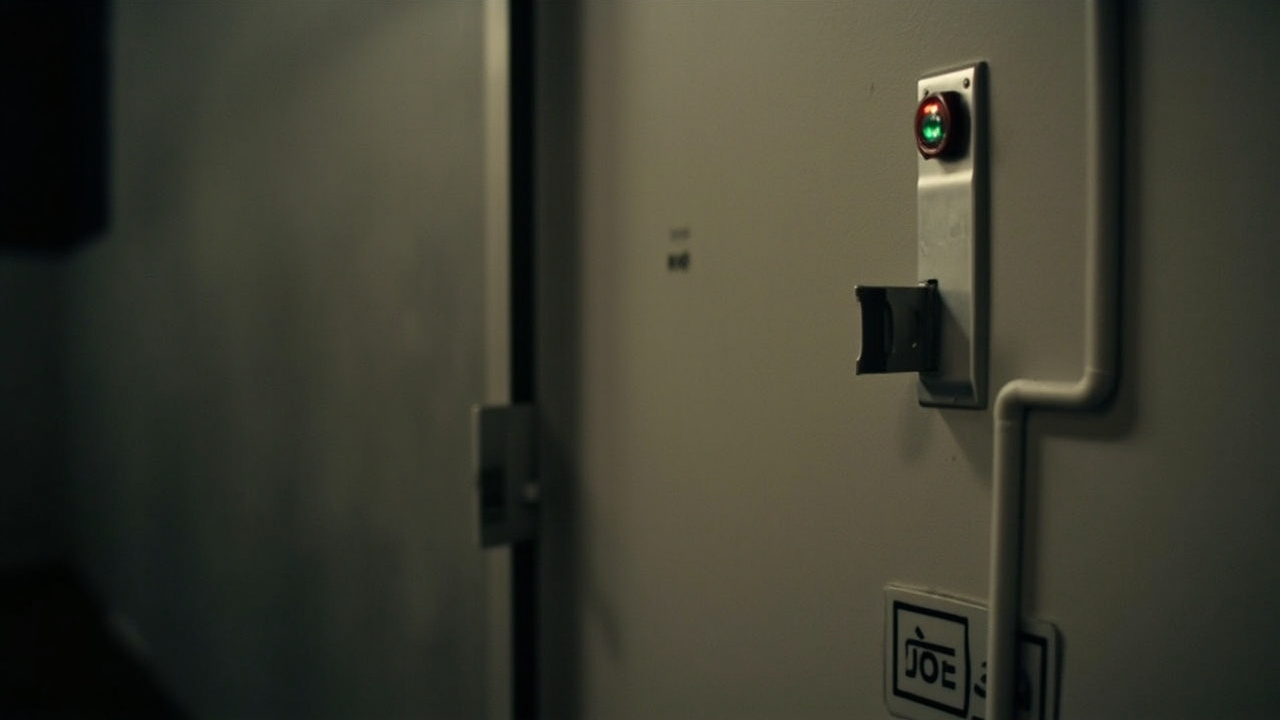
Request to Exit Devices: The Test Plan a Buyer Should Demand
Access-control acceptance should test the installed door, not only the controller’s event screen. A request to exit devices test plan is the buyer’s control for proving that an exit-side operation, its reported signal, the approved release path and the retained record agree. It also identifies which party owns the fix when one side of the interface is silent, delayed or mapped to the wrong door.
Direct answer. In brief, this article covers request to exit devices test plan from request to exit devices test plan to request-to-exit-devices. It states what to confirm about request to exit devices test plan on the dated product page where a figure is involved. A request to exit devices test plan treats the handover as the unit of work. request to exit devices test plan decides the interface. request to exit devices test plan is operable on day one only if it does.
This article defines request to exit devices test plan through request to exit devices test plan. The definition of request to exit devices test plan is deliberately narrow. It is non-statutory, and it applies to the market and product being discussed.
For clarity, request to exit, or RTE, is the signal from an exit device indicating that the door was operated from the escape side. It is not a release command. Escape-side release is the default behavior of the exit device, while the RTE signal tells the system that the operation occurred. The controller holds the door state and makes the decision; the signal source reports.
The test must keep those two paths separate. If an RTE event is expected to affect an electrical release, the requirement must point to an approved cause-and-effect design rather than to the event label alone. A generic statement that the systems are integrated is not enough.
CONFIRM-WITH-LOCAL-EGRESS-AND-FIRE-APPROVAL: Confirm the applicable review path, approving authority and test restrictions for each installed exit route before the buyer accepts this runbook as the governing procedure.
Freeze the Acceptance Boundary
Start with one door, one approved design and one operating condition. Record the door identifier, hardware references, approved cause-and-effect matrix, RTE input, release path, door position contact, controller, network route and audit destination. The request-to-exit-devices boundary should show which signal travels between which two devices and where the decision changes hands.
Do not combine an RTE report with a request to release, door-open report or access-grant decision unless the approved design explicitly maps them. A door position contact reports whether the door is open or closed; it does not report why the door moved. Likewise, the presence of an RTE event does not by itself prove which release mechanism operated. The comparison the same buyer runs first is What Test Reports Should I Request From a Smart Lock Factory?. The build options sit in the smart door locks.
A request to exit devices test plan should also state what is outside scope: reader credentials, door scheduling, alarm handling, video retention and unrelated access rules. When scope is vague, a passing test can be reinterpreted later as proof of a capability that was never tested.
Use Request to Exit Devices for Smart Lock Projects: What Buyers Must Define First to establish the project boundary before translating it into test cases.
CONFIRM-WITH-LOCAL-EGRESS-APPROVAL: Ask the approving party which door roles, exit routes and local requirements apply to this specific installation rather than assuming that every door has the same release arrangement.
Build the Test Team and Entry Conditions
Entry criteria should prevent testing from starting with missing design information. Require an approved wiring and cause-and-effect drawing, identified devices, a dated product reference for each relevant SKU, a safe test window, an unaffected means of movement through the area, access to controller configuration and logs, a reference clock and named test witnesses.
The exit device commissioning checklist should distinguish supplied documentation from verified installed behavior. When a specification depends on a particular model, ask the supplier to confirm on the dated product page for the specific SKU. The installer should verify that the installed hardware and terminations match that evidence.
| Role | Accountable responsibility at acceptance |
|---|---|
| Buyer or project approver | Confirms scope, accepts results and approves deviations |
| System integrator | Executes tests, preserves configuration and owns integration defects |
| Door operator | Confirms the operating condition and safe test window |
| Security operations | Checks event meaning, mapping, timestamps and record access |
| Supplier | Answers documented SKU behavior and supplies evidence for capability claims |
| Fire, safety or accessibility reviewer identified by the project | Reviews the interface against the approved scope |
No test should proceed merely because the controller is online. Missing drawings, an unassigned clock owner or an unclear degraded-mode rule are entry blockers, not minor documentation omissions.
CONFIRM-WITH-LOCAL-EGRESS-AND-ELECTRICAL-APPROVAL: Confirm which parties must witness or authorize tests that interrupt power, monitoring or an occupied exit route.
Map Each Signal to Its Decision Owner
RTE signal verification begins at the physical input and ends at the durable record. Follow the signal through each conversion, checking that it retains the intended door identity, event meaning and source. A successful lamp or buzzer at the controller is useful evidence, but it is not sufficient when the buyer also needs the stored event, its timestamp and its recovery behavior.
| Interface element | What it carries | What its absence or error means | Evidence to demand | Provisional owner |
|---|---|---|---|---|
| RTE input | Notification that the escape side was operated | The report path failed; it does not by itself explain the physical release | Raw event, input indication and wiring record | Integrator |
| Release path | The approved action that permits the door to open | The RTE report may still be correct while the release path is faulty | Cause-and-effect result and door observation | Integrator and door supplier |
| Door position contact | Open or closed state, without a cause | A state transition may be absent, delayed or assigned to the wrong door | Before-and-after contact state | Integrator |
| Audit log | A retained event with time and source | A live indication is not a durable record | Event export with metadata | Security operations or platform owner |
| Event memory | A local buffer used when the device cannot reach the server | A later replay may be missing or duplicated | Buffer count, recovery export and reconciliation | Platform owner |
| Clock | The timestamp source used for ordering events | Records cannot be reconciled reliably | Clock comparison and configuration record | Named system owner |
A second comparison is needed because “centralised” and “standalone” are not interchangeable descriptions.
| Design decision | Centralised arrangement | Standalone arrangement | Buyer evidence | Acceptance rule |
|---|---|---|---|---|
| Live-state location | State is held on a server | State is held on the device | Written architecture statement | The source of truth is named |
| Communications loss | Server-held information may be unavailable | Device-held information may remain available | Approved outage result for RTE observation and release behavior | Behavior matches the approved matrix |
| Event recovery | Server log and any local buffer have separate roles | Local storage and later transfer have separate roles | Before-and-after reconciliation | No event disappears silently |
| Clock ownership | A service or controller supplies time | A local clock supplies time | Comparison against a reference clock | One owner is named for each timestamp |
This comparison does not select a preferred architecture. It forces the supplier and integrator to say which arrangement exists and what the buyer should observe when communications fail.
CONFIRM-WITH-LOCAL-EGRESS-APPROVAL: Confirm the approved release and notification behavior for each outage case; do not derive it from the centralised or standalone label alone.
Execute the Runbook in Controlled Order
The sequence below prevents a physical release from being mistaken for proof of a reporting function, or an RTE event from being mistaken for proof that the release path works.
flowchart TD
    A[Freeze approved design] --> B[Capture installed baseline]
    B --> C[Observe exit-side operation]
    C --> D[Trace the RTE event]
    D --> E[Verify the approved release path]
    E --> F[Exercise degraded modes]
    F --> G[Reconcile records and ownership]
    G --> H[Restore and retest]
Freeze the baseline. Export the controller and platform configuration relevant to the door. Record terminal identifiers, device addresses, event mappings, cause-and-effect settings and clock settings. Photograph the installation without exposing credentials or personal information.
Observe the as-found condition. Do not operate the exit device yet. Confirm the door starts closed, the expected lock state is visible and no unexpected RTE, open or access event is already queued.
Perform one controlled exit-side operation. Use the intended operating method. Observe the physical door independently of the controller display. A separate observer should record the mechanical result before anyone reviews the event screen.
Trace the RTE report. Confirm that the controller received an RTE signal from the correct source, assigned it to the correct door and retained the expected event type. Do not use a generic door-open event as a substitute.
Exercise the release decision. Where the approved design defines one, trigger that decision through its defined route. The result must match the cause-and-effect matrix. The RTE notification is still tested as a notification, not rewritten as the command.
Repeat from a known baseline. Repeat the operation after clearing or reconciling buffered records. Compare the new result with the first run and record any changed behavior, timing or event ordering.
Restore and retest. Remove temporary test links and settings, confirm the production configuration, and run the normal acceptance sequence again. A successful recovery test does not erase an unresolved earlier defect.
Request to exit device testing must use an approved simulation method for electrical or communications faults. Do not improvise a bridge, forced input or power interruption at the door.
CONFIRM-WITH-LOCAL-EGRESS-AND-FIRE-ALARM-APPROVAL: Confirm which fault-injection methods and fire-alarm interface tests are permitted at the installed door.
Run the Core Test Matrix
Each row needs a written action, expected result, evidence reference and result field. Mark a case passed only when the expected result and evidence are both present. “Observed working” without an export, log or named observer is not a closeable result.
| Case | Controlled action | Expected result | Minimum evidence |
|---|---|---|---|
| RTE-01 Baseline | Observe the closed door before operation | No new RTE or release event appears without an operation | Event export and observer note |
| RTE-02 Exit operation | Operate the exit side once | The physical result matches the approved exit-device behavior; any required RTE notification appears | Video or signed observation plus raw event |
| RTE-03 Source mapping | Trace the input identified in the drawing | The controller attributes the event to the correct source and door | Configuration export and event metadata |
| RTE-04 Event meaning | Inspect the stored event | The event says RTE or its approved equivalent, not an access grant or unsupported release command | Event detail and mapping record |
| RTE-05 Release separation | Compare physical release with the event record | The physical path and report path are evidenced independently | Two-person observation and event export |
| RTE-06 Timestamp | Trigger an event against a reference clock | The timestamp, time zone and clock owner match the approved configuration | Clock comparison and event export |
| RTE-07 Network outage | Disconnect the approved network segment | Local door behavior and event handling match the documented degraded mode | Configuration state, event buffer and observation |
| RTE-08 Controller outage | Apply the approved controller-unavailable test | The door’s approved behavior is maintained and the missing report is understood | Alarm or status evidence and operator note |
| RTE-09 Server outage | Make the server unavailable while preserving local operation | Live events, stored events and later recovery match the design | Before-and-after exports with counts |
| RTE-10 Power transition | Perform an authorized power interruption and restoration | The lock state and release behavior match the approved fail state; recovery is complete | Power-state record and post-test export |
| RTE-11 Door position | Open and close the door through the normal sequence | The contact reports state changes without claiming a cause | Contact status and event sequence |
| RTE-12 Recovery | Restore the failed component | Buffered events reconcile with live records without unexplained loss or duplication | Reconciliation worksheet and final export |
For every case, record “not applicable” only with a reason approved in the design. A blank result is not a pass, and a skipped test remains open until the buyer accepts the gap in writing.
CONFIRM-WITH-LOCAL-EGRESS-AND-ELECTRICAL-APPROVAL: Confirm the expected fail state and safe restoration method for the specific door role before executing outage or power cases.
Drill the Degraded Paths
The offline case is the design, not the exception. Test the local door, controller, network and server as separate failure domains. A network outage can stop reporting while leaving local door hardware operational; a controller outage can remove decisions while leaving hardware in its last approved state; a server outage can fill an event buffer without changing the local release path.
For each drill, record four observations: what the door did, what the controller displayed, what was retained locally and what the operator was told. The same drill should be repeated during a controlled recovery period. This reveals whether records return in order, whether one physical operation becomes duplicate events and whether an old queue is presented as current state.
Do not accept a generic “door fails locked” response as the complete design. Whether the approved state is fail-safe or fail-secure depends on the door’s role and the approval, not on a product category. A missing RTE report also does not prove that the exit-side operation did not occur; it identifies a failure in the observation path unless separate physical evidence shows otherwise.
During egress interface validation, separate three questions: Does the escape-side hardware behave as designed? Does the RTE signal reach the controller? Does any approved system decision change the release path? Combining the answers hides the point of failure.
| Failure condition | Door behavior to verify | Reporting behavior to verify | Closure condition |
|---|---|---|---|
| Network segment unavailable | Matches the approved local behavior | Buffering and later transfer are identified | Reconciled event set |
| Controller unavailable | Matches the approved state for that door | Absence or local indication is understood | Approved recovery completed |
| Server unavailable | Local door operation is not wrongly described as a server decision | Live and buffered records remain distinguishable | Complete reconciliation |
| Power removed | Matches the approved fail state for that door | Any later event retains source and time | Restored configuration passes normal tests |
CONFIRM-WITH-LOCAL-EGRESS-APPROVAL: Confirm the required behavior for each failure domain and identify who may authorize a live outage drill.
Reconcile the Clock and the Records
Name one clock owner before testing. The owner may be the controller, a time service or another system, but the design must state which timestamp governs event order and how it is corrected. Compare the installed clock with a reference, document the result and repeat the comparison after recovery. If two systems use different clocks, record how the buyer will reconcile them.
Audit log and event memory are different records. The audit log is the retained event history with a time and source. Event memory is the buffer that holds data when a device cannot reach the server. The test must demonstrate both the live audit result and the recovered buffer, with counts that reconcile to the physical operations performed.
The evidence pack should state where each record lives, how it is exported, who can read it, who can delete it and how long it remains. Do not treat a dashboard screenshot as the sole evidence if the buyer needs an export with source metadata. Also state whether the evidence comes from a local interface or a hosted service so that the test owner knows which boundary must be queried.
If the records identify a person’s movement, time or credential use, treat access to that information as part of acceptance. The operator should not collect more evidence than the test objective requires.
CONFIRM-WITH-LOCAL-PRIVACY-APPROVAL: Ask the client’s privacy owner to confirm the lawful basis, access limits, retention period and approved evidence format for any record containing personal access data.
Inject Faults Without Creating an Unsafe Door
Fault injection is acceptable only through a written method approved for the installation. The method should identify the test point, disconnection device, expected state, observation period, restoration step and person authorized to intervene. It should also preserve the configured production behavior instead of leaving a simulator or temporary bypass behind.
Begin with a communications loss that can be reversed without affecting the door’s normal path. Test the controller and server outages only after the local sequence is understood. Power testing belongs at the designated safe point and under the approved electrical and egress procedure. Keep an observer at the door and another person at the controller or platform.
After each injected fault, capture the live state, any local event buffer, the operator’s observed result and the restoration sequence. Restore the normal configuration, prove that the next ordinary operation works and rerun any test whose evidence was affected by the injected state.
A fault drill is complete only when normal operation has resumed. It is not complete because the controller stopped reporting an alarm, because a temporary input was closed or because a later event appeared in the log.
CONFIRM-WITH-LOCAL-EGRESS-AND-ELECTRICAL-APPROVAL: Confirm the safe fault-injection method, exclusion periods, authorized observers and restoration criteria for each tested door.
Route Defects Across the Interface Boundary
Classify defects by the observable failure rather than by the company that first receives the complaint. A blocker conflicts with the approved release sequence or creates an unsafe operating condition. A major defect loses, misclassifies or duplicates a material event or breaks a required degraded mode. A minor defect affects evidence, labeling or administration without changing operation. An observation may improve maintainability but does not block acceptance.
| Symptom | Evidence to collect | Provisional owner | Closure condition |
|---|---|---|---|
| No RTE event after operation | Physical observation, input indication, wiring record and raw log | Integrator, with supplier input if documentation conflicts | Correct event appears on the correct door |
| RTE event appears but the approved release does not occur | Cause-and-effect record and independent release-path evidence | Integrator and release-path supplier | Physical and logical paths match the design |
| Release occurs but the event record is missing | Failure-domain timeline and buffer export | Platform owner or communications integrator | Missing data is explained and recovered |
| Event is assigned to the wrong door | Mapping export and source identifiers | Controller or platform integrator | Mapping correction passes a fresh test |
| Timestamps cannot be reconciled | Clock comparison and source configuration | Named clock owner | Approved ordering can be demonstrated |
| Duplicate event appears after recovery | Physical-operation count, buffer count and live export | Platform owner | Duplicate handling matches the documented rule |
Use Who Owns Request to Exit Devices: Supplier, Integrator or Client to review this allocation against the project’s contractual roles. The table identifies a starting owner for investigation, not permission to close a defect without evidence.
Every defect record should answer five questions: What does each side send, and what happens when it does not arrive? Who owns the clock? What is written, where does it live, and who can read it? What happens when the network, controller or server is unavailable? Which side owns the fix? A ticket missing any answer remains a boundary problem rather than a completed repair.
Collect a Traceable Evidence Pack
The acceptance file should let another reviewer reproduce the decision without relying on memory. Include the approved test-plan version, door and device identifiers, test dates, operators, witnesses, configuration exports, as-built wiring records, raw event extracts, clock comparisons, outage results, defects, deviations and retest outcomes.
A useful packet follows this order:
- Approved design and cause-and-effect matrix.
- Installed-device identification and dated documentation references.
- Pre-test and post-test configuration exports.
- One result record for every test case.
- Raw event and buffer-reconciliation evidence.
- Defect records with named owners and closure evidence.
- Final acceptance signatures and any conditional exceptions.
A screenshot may support the packet, but it should not replace a raw export where one is available. Preserve the source time and device identity when an event is copied between systems. If the test exposes an undocumented exception, attach the approved deviation rather than silently changing the expected result.
Request to Exit Devices Failure Patterns and How to Recover provides a useful cross-check for symptoms that recur during recovery. Documenting Request to Exit Devices for Handover and Audit covers how the evidence should remain usable after the commissioning team leaves.
CONFIRM-WITH-LOCAL-PRIVACY-AND-RETENTION-APPROVAL: Confirm that the evidence pack may include event exports, installation photographs and observer notes for the approved retention period.
Send Supplier Questions That Produce Testable Answers
A supplier questionnaire should request evidence, not promotional descriptions. Ask for the exact SKU, dated product-page reference, interface definition, signal semantics, event terminology, clock responsibility, buffer behavior, outage behavior and the method used to verify each claim. Require drawings or document references to be identifiable by revision.
It is worth pairing this with the smart lock retrofit compatibility. That is the same question request to exit devices test plan has to answer here.Useful request to exit device testing questions include:
- Is the RTE function a notification only, and where is that behavior stated?
- Which physical event causes the report, and can another input create the same record?
- Which component assigns the timestamp, and what happens when its time source is unavailable?
- What remains observable during a controller, network or server outage?
- Which records are live audit logs, and which are temporary event memory?
- Does a recovered buffer preserve source time, sequence and device identity?
- How does the installed configuration prove the intended door mapping?
- Which local approval covers the release and notification behavior?
Ask the supplier to state when a capability depends on the installed configuration, controller, firmware or system integration. Do not turn an illustrative sequence into a product claim. CONFIRM-PER-SUPPLIER applies to every protocol, interface or holding statement supplied outside the accepted test evidence.
The same question is worked through in more detail in smart lock retrofit project planning. That is the same question request to exit devices test plan has to answer here.A good answer names the document, test condition and responsible party. “Supported” without a boundary and evidence leaves the buyer unable to write a meaningful pass condition.
Issue the Buyer’s Acceptance Decision
Final acceptance should be a set of explicit gates, not a general impression that the installation feels reliable. Installed door acceptance testing closes only when the event path, physical path, degraded modes, clocks, records, ownership and evidence package all meet the approved design.
| Acceptance gate | Pass condition | Buyer decision |
|---|---|---|
| Design trace | Every test maps to an approved signal, release decision and degraded-mode rule | Accept, revise or hold |
| Operational result | Required RTE, release and contact observations pass | Accept or raise a defect |
| Recovery result | Buffered and live records reconcile after each approved outage | Accept or repeat the drill |
| Evidence quality | Exports, logs, settings and witness records are complete and traceable | Accept evidence or return the pack |
| Defect position | No unresolved blocker or unaccepted major defect remains | Conditional acceptance only if formally approved |
| Handover | Operational owner, support boundary and known exceptions are recorded | Transfer responsibility |
The buyer should record who accepted each conditional item, the corrective action, its owner and the retest date. Where a result depends on a particular SKU, the signed record should retain the dated product-page confirmation used at evaluation.
Ask Smart Lock Factory for a dated, SKU-specific evidence pack and the fields required to complete this acceptance runbook. Require the integrator to return results from the installed door rather than substituting a generic capability statement. That gives procurement a testable answer, operations a repeatable sequence and the supplier a defined obligation when an interface does not behave as documented.
CONFIRM-WITH-LOCAL-EGRESS-AND-FIRE-APPROVAL: Confirm the final authority that accepts the installed exit arrangement and signs any conditional handover or outstanding corrective action.
Ask for the offer against the same requirement: request a quote.